Showing posts with label design. Show all posts

Monday, March 5, 2012

Sewing Nook Makeover -- Updates

I'm still working away little by little on the sewing nook makeover.  Most updates are pretty minimal at times, but this weekend I was able to make a few changes that are starting to make it look complete!

The last we saw of this space, the furniture had been put back into place and a lot of storage had been purchased and put to good use.

At this point, it was functional once again, just not quite finished. There were many additional touches I had on the list but some of the major items left included the doors of the china hutch which still needed to be installed and a much needed place to sit -- I'd had enough of the wobbly stool I'd been trying to use. 

After some online / on foot shopping and a few hours of sweat and handy work, my sewing nook is looking like this these days...


Some of the more obvious updates include the new chair...

...ahhh, finally a place to sit!  And yes, those are the puppies behind the chair -- it's nearly impossible to photograph anything without getting some part of them in the picture.  But back to the chair, it's long, lean legs are not resting on just anything...

... they have a super soft place to land on a new rug!  It's definitely less of a necessity, but I'm so so so happy with it and I think it does an amazing job of defining the whole space and tying it all together.  I love the pattern, the color, the feel, the size, EVERYTHING about it is perfect! 

Maybe I'm most excited about it because the rug hunt has not been an easy one -- I first ordered this one from Overstock.com (which now appears to be sold out).


Online, I loved the color and pattern and it's hard to beat $2.95 shipping. But when it arrived and I got it into place, it was all wrong. The color looked more muted and almost dirty, it wouldn't lay completely flat, and it was not at all soft underfoot.  I lost $15 sending it back, but I knew I would not be happy keeping it. And so the rug search continued...

I found the one I ordered at HomeDecorators.com and loved it immediately, but wasn't super happy about the price.  I had really wanted a 5x8 rug since it's pretty much the exact size of the nook, but was willing to order the 4x6 to cut down on cost. I continued to do some looking around, but never found anything I liked as much.  After going back to stare at the picture once again, I lucked out and stumbled upon a 20% off rug sale!  For a craft room, it still wasn't cheap, but it was something.  I decided to do some measuring and contemplating about which size to order, so I waited a few days before making the final decision. When I'd made up my mind and went back to the site, chairs were also 20% off AND there was free shipping for a limited time.  I looked through the seating options, and found the teal beauty you can now find me sitting at every night.  It wasn't what I had originally planned on purchasing, but at 20% off the chair and rug AND free shipping, it made my decision an easy one. With all the savings, I justified the 5x8 rug purchase and patiently waited for my goodies to arrive.

The chair arrived first and has already gotten a ton of use.  Then the rug showed up and as much as I wanted to roll it out immediately, there was one more thing I wanted to do which I feared might make a bit of a mess -- install some new lighting!
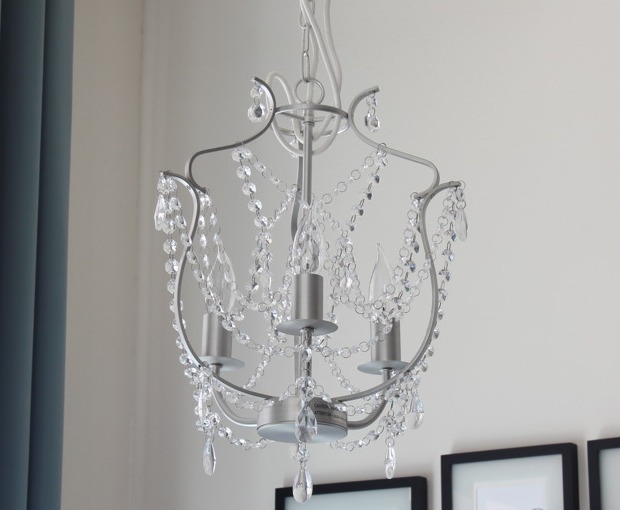
What girly crafting area would be complete without a new chandy hanging above?!  This one I found at IKEA and bought immediately because of the great price.  Despite my 10 foot ceiling and very limited knowledge of electrical work, I managed to take down the old, boring light and install this one myself. And even more shocking, it turns on and has not caused a fire -- not yet at least :)  The one thing I still need to do is shorten the cord. This light had a lot of extra length to it. Removing the extra chain lengths was no easy task, but I didn't fear shoty electrical work doing it. Shortening the actual cord, scares me a little more, so I haven't jumped right into that. For now, I just try to ignore all that extra white cord wrapped around and just enjoy the new look and extra light it provides.

The last and slightly less obvious update in the sewing nook are the doors which have been added to the china hutch.

Other than helping me out by cutting back on dust accumulation, it was a pretty minor change but was a long time coming. I dreaded doing it because I needed to remove the paint I got on the glass during the painting phase, redo the hinges/hardware that would show, and hopefully reinstall them so they hung level. 

The paint removal turned out to be pretty easy and just required some scrapping with a box cutter.  The hinge makeover took a little more time, but was also pretty easy and worked better than I thought it would. I started out with some very worn, brass hinges which I wanted to be nickel to match my hardware.  After a fruitless search for something to replace them with, I decided to just try my hand at painting them. I first put all of them in bowls, then let them soak in soapy water, gave them a good scrubbing and let them dry.


I then followed the directions on the Rub 'n Buff package and started to transform each piece.

They are by no means perfect, but since so little of them shows, I think they turned out just fine.  Once they got into place, they blended in perfectly with the new hardware.  Hanging to doors level turned out to be quite a challenge -- one that I'm still working on actually. The middle door is so uneven, it doesn't quite shut. If I have some "ah-ha!" moment where I figure this out, I'll be sure to share. For now, I'm living with the imperfection :)

That's the last of the updates in here for now! Still on the list is to add some color to those plain white boxes, the lamp shade and the cork board. It should be easier to make a decision on those things now that the rug and chair are in place.  Until then, this is where I'll be whenever I have free time...


Happy Monday to everyone! Hope your weekend was equally as productive :)

Monday, January 23, 2012

Sewing Nook Makeover -- Gettin' Organized

All last week -- taking it one day at a time after work -- I managed to get all the touch-ups completed on the china hutch turned craft storage. This included fixing the door I accidentally screwed through, sanding, priming, painting, and sealing the back piece, then covering it with fabric, and eventually nailing it into place.  It's hard to tell in pictures, but the fabric I chose has a very subtle grey dot, which ties in with the newly painted grey desk perfectly.


I have yet to reattach the doors because I want to attempt a hinge makeover. I read about a product called Rub 'n Buff that is supposed to work on metal and I think with a little elbow grease, I can get the hinges to match the new hardware a little better.  I'll let you know how those turn out as soon as I get started.

The lack of doors did not stop me from moving right on to organizing though. I have been waiting weeks to get to this part!  After a trip to The Container Store, I came home with three desktop files, three DVD boxes and three photo boxes.  Finding concealed storage was actually a bit tricky because the china hutch is not very deep -- just 9 1/2 inches on top -- and the dividers on the front constrain the length. I found desktop organizational items to be the best fit because they allowed me to take advantage of the height and most weren't too deep.


 I also grabbed a few other items I already had and planned to use and started to layout the shelves.


When I was happy with the placement, I went all over the apartment and started gathering everything I hoped would fit in this one place. I emptied old storage bins and started grouping items to see how much space they would need. Box by box, the floor started to clear up and the baskets started to fill up.  I tried to keep similar things -- such as office supplies, sewing supplies, craft supplies, etc. -- on the same rows and the most commonly used items as easy to get to as possible. By the end, I was able to store sewing, craft, scrapbook, camera, paints, and even computer items in this area.  My laptop even fits in my desk drawer! 


After moving everything to one spot, I now have so much extra space in my closet and bedroom -- I feel a total apartment re-organization is in the near future :)

But back to the craft nook -- there are still a few more changes I plan to make in here. I am not a fan of so much solid white, so I have ideas for sprucing up the storage bins to add a bit more color.  I'd also like to add some fabric to the lamp shade and the cork board so they aren't as 'blah' as they are now.  Then there is always fabric that needs to be added to those high-water curtains, a rug for the floor and of course, a chair to sit at!  So much accomplished but still so much I want to do... In the meantime, I am loving the extra storage and plan to sit at a tiny, unstable stool just so I can get working in here :)

Monday, January 16, 2012

Sewing Nook Makeover -- Painting

Progress -- more specifically, painting -- has been slow going on the sewing/craft nook makeover, but things are finally starting to come together! This is especially exciting because the level of un-organization is really starting to get to me and I have at least 5 things lined up on my sewing to do list that I'm anxious to get started on -- Katie, yours is at the top of my list! 

As of this morning, the nook is looking like this...


It's a tad bit messy but I see it as a vast improvement over the 'doors-and-drawers-everywhere-drying' look I had going on just a few days ago.  Several things to note in that picture: first, the desk is totally complete and finally in working order, just need to find a chair to sit at so I can start sewing again! second, the new hardware has been installed -- yay! and a BIG THANKYOU to the boy for drilling all those new holes! third, the doors need to be reinstalled and fourth, the back to the china hutch is still untouched and unattached.

First things first, the painting. My strategy basically consisted of a lot of online research -- mostly reading through posts such as this and this from some of my favorite DIY bloggers -- and talking to the wonderful people at home depot when I purchased supplies.  Since this was my first painting adventure and I am by no means talented in this area, I'll keep my description of the process to this: I removed all doors, drawers, and hardware, filled necessary holes with wood filler, sanded everything with medium grit sandpaper, de-glossed every surface, primed, painted (x3), added a protective poly coat (x3), reinstalled new/old hardware, and put drawers and doors back on.  For each of those steps, I simply followed the directions on the bottle/tub/can to find out the best application process or tool to use and proper drying times.  I followed the same steps for the desk and china hutch, just using different paint colors. 

When it was finally time to add the hardware, I was equally excited as I was scared.  After all that work, the last thing I wanted, was to drill a hole in the wrong place or have things not level and even with one another.  I decided the most fool-proof method was to make a template and have the boy do the drilling -- of course he didn't mind since it meant he could use power tools :) 


Template may actually imply something fancier than I used -- I simply traced one of my drawer pulls onto a piece of card stock, and found the center of each circle.  I then measured on each drawer or door to find the proper placement, secured the template with painters tape, and the boy drilled right through the center.  When it came time to attach the handles, all were spaced perfectly and they appear to be even with one another!


After making it through that exciting/scary step, I was eager to get the doors put back on. When I removed all the old hardware, I kept everything in a bag in case pieces needed to be reused.  I tried for days -- on foot and online -- to find nickel hinges to replace the old brass ones so they match the new drawer pulls, but had no luck. Apparently, the half circle hinge in size 1 3/4" is not popular these days.


After accepting hinge defeat, I decided to put the old brass ones back on and hope it isn't too noticeable. If it does bother me, I can always attempt to spray paint them later on.  So, while the boy was finishing the new drawer pulls, I started reattaching the old hinges and the doors.  With the first one in place, I proceeded to close it to make sure the fit was right and to my horror, found this...


I must have been too eager to even notice that the old screws were two different sizes -- a longer one that fits into the china hutch and a slightly shorter one for the doors.  I felt utterly defeated.  Knowing I would have to go through the painting process once again on this door, I angrily removed it and the hinge and called it a night. Despite the set-back, I'm hoping to get the other doors attached soon -- triple checking screw sizes -- and start filling it up! I figure I can handle one missing drawer for a couple days :)

Along with correcting the door, I have to decide on what to do with the back.  I bought some fabric that I want to line it with, but when I draped it over, I noticed you could see the wood paneling showing through. Right now I'm deciding between painting it and then adding the fabric, or simply getting a solid piece of white fabric to attach underneath.  The double fabric option seems to be the fastest solution, but down the road, I may appreciate having the back painted the same as the rest of the hutch in case I decide to scrap the fabric -- pun intended :)  I suppose it won't be too much more work since I'll have the paint out for some hinge mishap corrections. So, you know what I'll be doing this week -- fingers crossed that I'll be done in just a few more days!

Friday, January 6, 2012

Sewing Nook Makeover -- Planning

Well, I decided to re-sign my lease for another year which means another 14 months in my apartment.  I LOVE my place and am so happy to be staying longer!  Plus, making this decision meant I could feel good about making a few changes I'd been contemplating.

The first thing i did was rearrange my apartment -- AGAIN! I'm somewhat indecisive on a furniture layout, if that wasn't obvious already.  It's back to the way it was from the very beginning with a few additions, but all that is for another post and another day. For now, know that it looks mostly like this once again.


Once the furniture swap was done, I set my sights on the sewing nook. I've been spending a LOT more time is this area lately, especially right before Christmas whipping up some gifts to give. It was becoming more and more obvious that the space was not working out so well anymore.  


Now that I'm able to complete things more quickly and starting more projects, I'm running out of room to store fabrics and things I typically use while sewing. Because of this, I have stuff stored in here, in my closet, in my bedroom, and random nooks and crannies around the apartment. It's exhausting trying to remember where each and every little thing is.  I am an extremely organized person and even I was struggling to keep up with where things were. It was clear, I needed more storage so everything could be in one place.

I remembered an old china hutch from my Dad's family that was being stored in a spare bedroom upstairs at my parent's house. We once used it in our 'craft room' at home to store things like glue, paper, scissors, markers, paint, etc. so I knew it could be easily transformed into a storage center for my sewing and random bits of crafting things. Lucky for me, my parents weren't at all torn about letting me have it. So, I did some quick measuring and it is an absolute perfect fit for my sewing nook -- I just needed to uproot the puppies' corner.

If you remember, a few months ago, I started a crate makeover to get this area looking more presentable while holding onto the much needed crates. I got this far, and haven't done anything since -- I'm also terribly indecisive when it comes to picking fabrics.


Since I never finished the makeover and the crates are portable, I wasn't too heartbroken to move them elsewhere. I'm still not ready to take those crates down permanently, so they have a new home in the living room -- and now that they're more visual, hopefully I will finally make a decision on some fabric and get them looking better! So, with the crates out of the way, I had room for my new storage.  Only problem, I wasn't happy with the current look of the hutch.  I loved the lines and shape of it, but wasn't crazy about the wood color, the knobs or the condition it was in. So, I decided it would need a new coat of paint -- luckily, my parents were also fine with me giving it a little makeover.

Knowing I was going to paint it, I started to think up a whole sewing/craft nook design scheme.  I thought the hutch would be most versatile in white -- here and later when I move -- so with that decision made, I started to figure out the rest of the area and landed on something like this...


I decided on a teal, yellow and grey color scheme so I could use a lot of what I already have and add in some cheerful pops of yellow. I picked out the grey as an additional 'neutral' so everything, including the walls, aren't white. The hutch pictured is similar to what I have inherited and will be white with a very subtle grey and white fabric background. There are three shelves in it and I plan to fill them with the grey and white storage containers (from The Container Store) along with some other pops of teal and yellow.  My black desk is being made over to a light grey similar to the one above and I would love a whilte lamp base with yellow shade to sit on top. The curtains are already teal and plan to stay. I haven't decided on a desk chair or a rug, but am searching for similar items to the ones above. The rest of the pops of teal, yellow and grey will be some fun accesories I have around and a few I've already found on random shopping trips.  Also, since the hutch has room for sewing stuff and more, I plan to store anything and everything that helps me be crafty and have therefore dubbed this little area my Craft Nook :)

Now, to make it happen... I have begun painting the hutch white and did manage to makeover my black desk to a pretty light grey and added some fun yellow knobs.  It's been slow, but I think it will be well worth it when I can have all my stuff in one place! For now though -- and all weekend -- back to painting!

Happy Friday!

Thursday, July 21, 2011

After the "After"

I have a problem -- I just can’t leave things alone.  After rearranging my apartment, I decided to rearrange again.  It wasn’t anything too drastic, but I think it helped make just about everything functional and serve some sort of purpose rather than being there because I had nowhere else to put it.  Before showing more photos of the second round of changes, I will warn that a few tweaks have been made since, all for the sake of improvement J
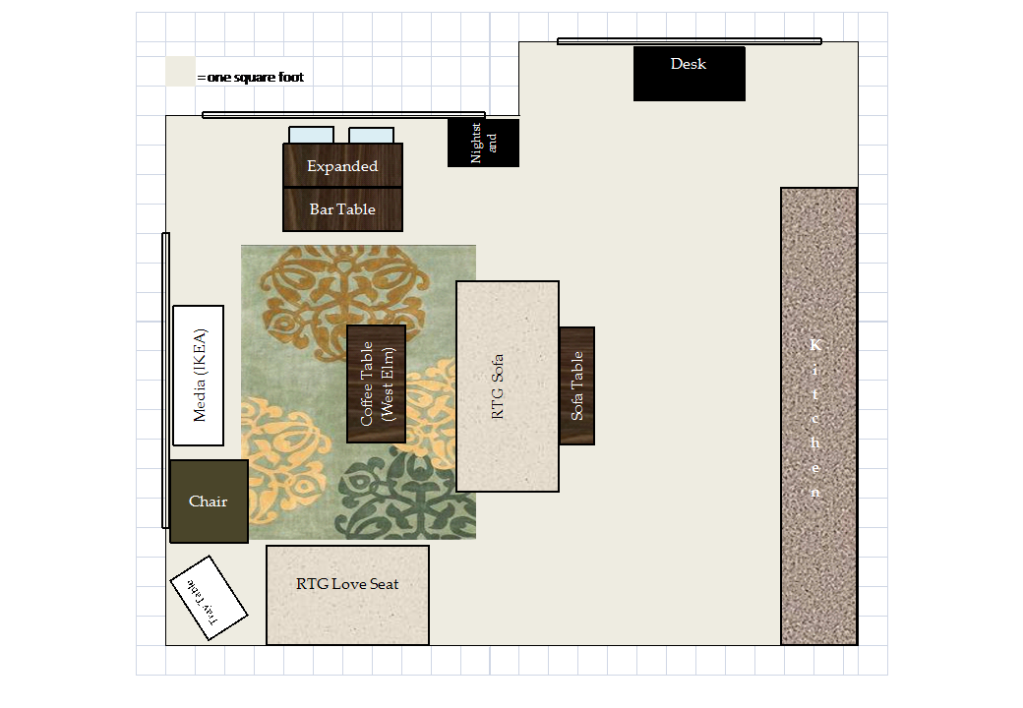
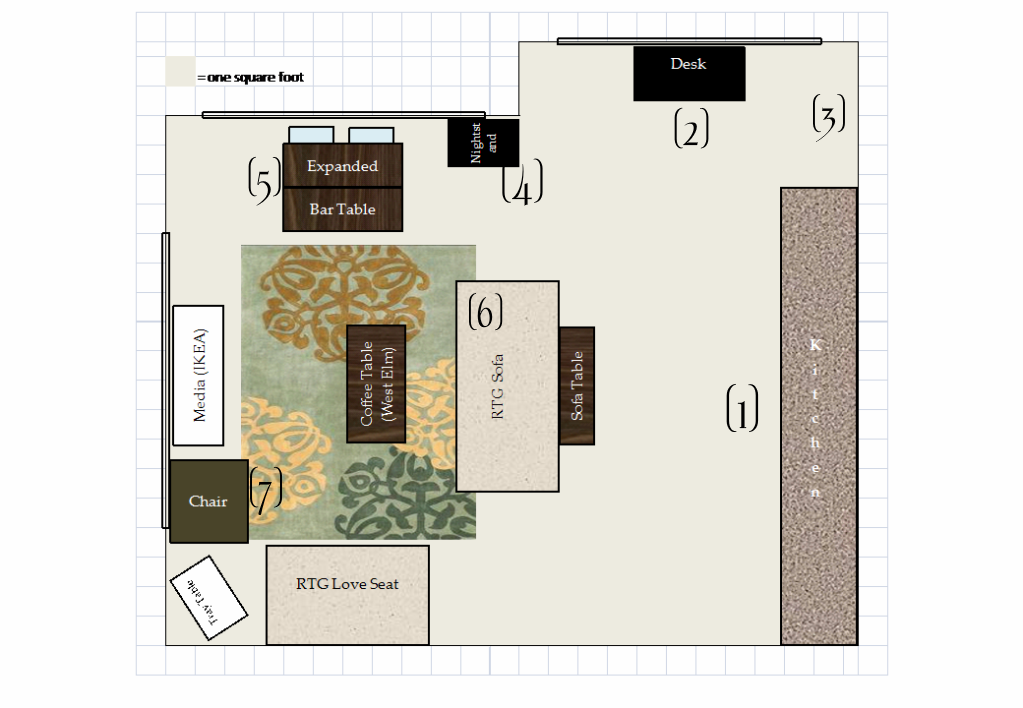
Because I hate to do things without my tried-and-true homemade furniture planner, here is a preview of the furniture layout via the lovely excel.
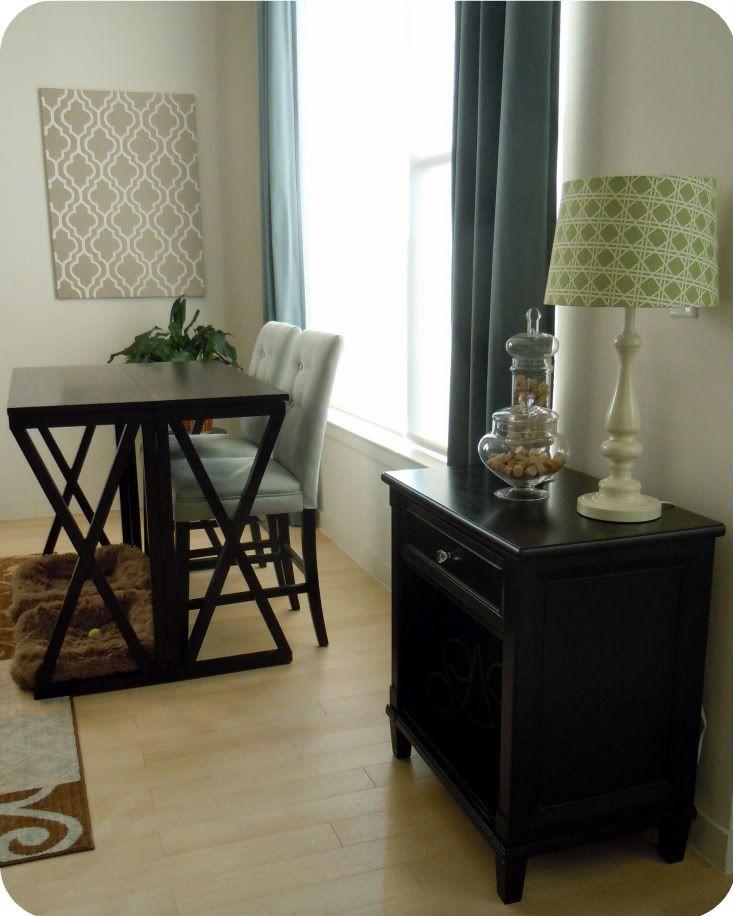
The biggest and most exciting difference is that I can expand the bar/table and have more than two people sitting at a time.  The lovely nightstand -- forever moving and changing roles -- is now in the “dining area” and has changed jobs to become a wine bar.  It fits so much better on this side of the apartment and actually serves a purpose now.


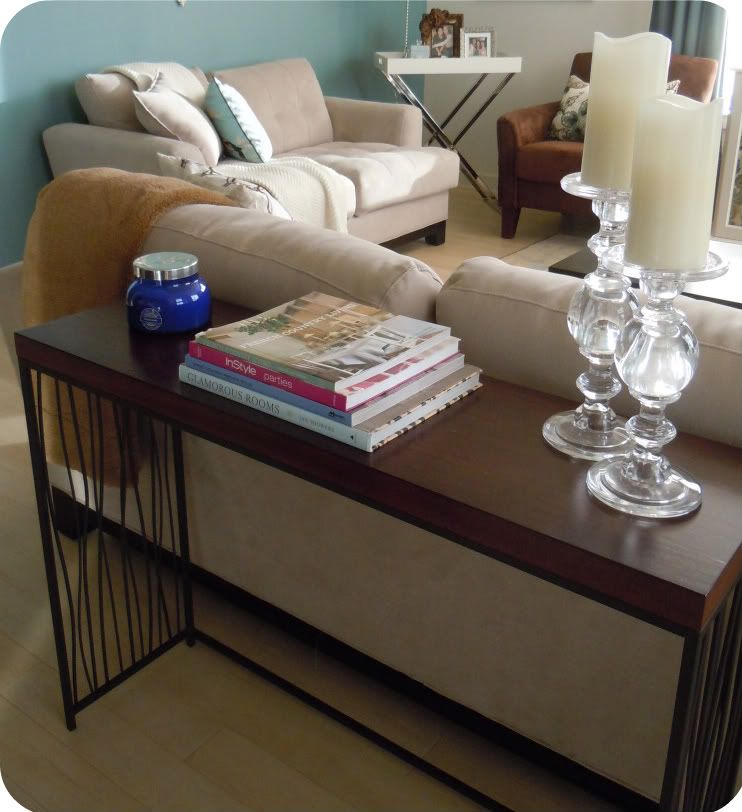
Another pleasant surprise with this layout is the sofa table which now rests behind the often used couch. This is the perfect spot for placing drinks and remotes while relaxing on the couch without having to lean in for the coffee table.
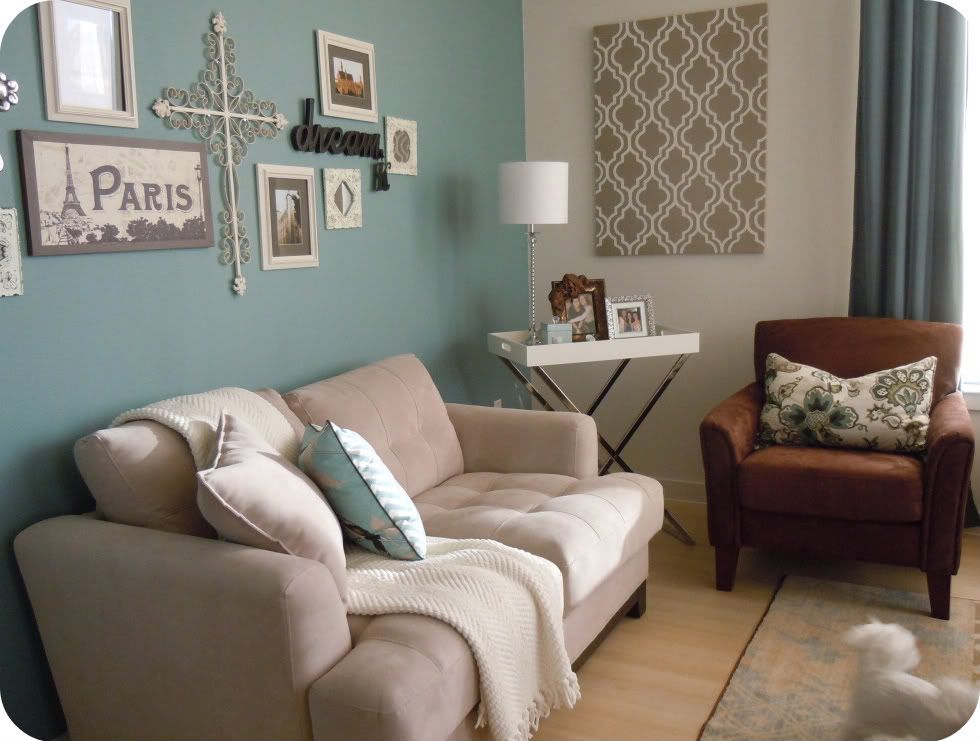
The loveseat is still within TV viewing range -- just opposite where it used to be. The chair is now next to the TV, so not optimal for viewing, but perfect for chatting or having coffee and flipping through a magazine on a Saturday morning -- one of my favorite pastimes.

All in all I am thrilled with the change and love having a full table once again.  I even celebrated the occasion by having some friends over for dinner and we were all able to eat together without two people on their knees at the coffee table. Win!  Also, I get full use of the table for sewing once again. This is seriously the perfect table for cutting fabrics and laying everything out while working on a project. 
Now, for some changes that have taken place but not pictured. 

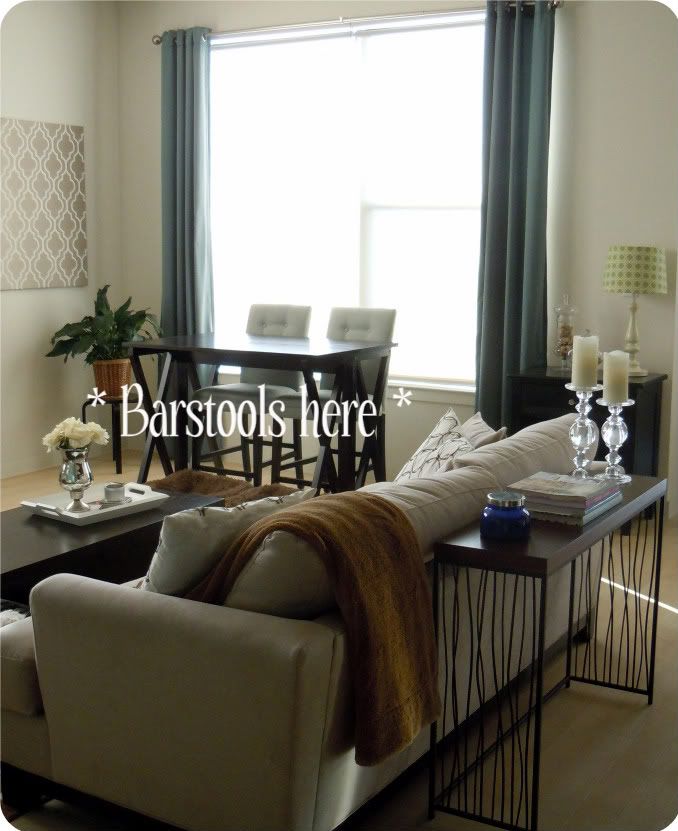
These lovely barstools -- scored on sale from Target for just $19 each -- have found a home at the table on the side facing into the living room. I am loving this option for two reasons: 1) the fit completely under the table without obscuring any walkways and 2) I didn’t want two more identical barstools because of cost and fear of non-coordinating colors.  I have always loved the mixed chair look, so why not apply it to a bar height table as well?!  I have visions of making them over one day with some fun fabric and more cushion --maybe even joining them together to make a bar height bench.  We shall see…
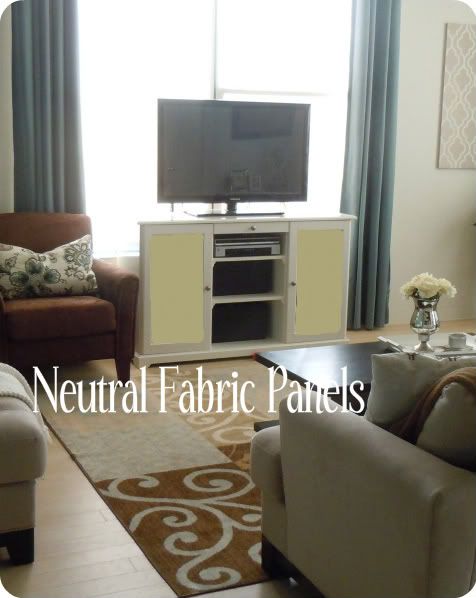
Another change I’ve made is to switch out the media cabinet fabric. With such a busy, patterned rug, I think the whole look is just too chaotic. I still struggle with how to bring in more patterns without competing with rug, and I just gave up on this fight. The fabric now is a neutral tan and much calmer next to the busy rug.
After this final furniture arranging session, I have realized just how many purposes this one room serves!
1) cooking, 2) sewing, 3) dog home, 4) wine bar, 5) dining, 6) TV watching 7) reading
Makes me feel a little less crazy for constantly switching things around -- hopefully they stay put for the long haul J

Friday, May 27, 2011

A Very Long Overdue "After"

It seems like ages ago I mentioned wanting to rearrange my apartment.  I played around with several floor plans and ultimately decided on Option 1.  It was a favorite among those I harassed politely asked for opinions from and made the most sense for the way I live. I really needed to pick an option which kept the sewing nook all it’s own since this fast growing hobby is taking over the apartment.
Despite revealing this more than 5 months later, I actually did the rearranging immediately.  Boyfriend moved to Dallas shortly after I made a decision, and once he was settled, I put him to work helping me recreate option one.  It looks mostly like the picture with the exception of a second chair and the end table is on the other side of the love seat. Here is a shot from the entrance to the great room: 
One from the other corner -- you can see my lonely chair and awkward nightstand posing as a side table:
Here’s an attempt to show how the sewing nook relates to the rest of the space: 
Overall, I’m really happy with the change.  I like how the living room feels cozier and separated from the kitchen, more like it's own space. I also love that I eat at the bar almost every night now and the glare on the TV is practically non-existent -- even in the middle of the day with tons of light pouring in through the massive windows. 
I’m still trying to fix up the blue wall to my liking. It feels a little too random and disconnected from everything else right now.   
I’m also trying to figure out a way to utilize the space behind the loveseat.  Due to centering the TV and couch on the window, the loveseat is a good 3 feet from the wall behind it.  
I’d love to be able to utilize this space somehow. I recently inherited a great new piece of furniture that I think may help with this. Once I figure these things out, I’ll be sure to show some updates -- there’s a good chance more rearranging is to come!

Tuesday, May 17, 2011

The Great Crate Debate

I have a secret, hideous corner of my apartment that has never been seen by the blogging world.  I’ve shown several pictures of my sewing nook which lead you to believe it is the perfect sewing space with nothing out of place. Although I do love it and think it’s great for my needs and perfect in most ways, I have intentionally left out views of the right side of this frequently used space.  See how pretty?
Little do you know -- and little do I like admitting -- that just to the right of my desk is a very unattractive and much neglected doggie corner. Unfortunately, it is the only place I can find to keep the not-so-glamorous dog crates that I use on a daily basis -- and while the puppies are growing and well behaved most of the time, I am still not brave enough to give them free reign of the apartment while I’m at work each day. We’ve been slowly working up to a full day with a few unsupervised hours here and there, but not even close to putting those crates up for good!  Alas, the extremely unattractive but very practical dog crates must stay.  
In my very first post, I explained that there were several ways in which projects of mine get started. One of the more common reasons I tend to begin something new is “to make a necessary and/or functional item coordinate with everything else.”  So, after more than a year of neglect, I have finally decided it is time to take on the task of disguising these eye sores.  You can see how desperately they need help and why I never show this corner of the apartment... oh, how shameful! 
To make matters worse, I have to admit that Nolan’s crate is actually the pink one -- I’m a terrible mother, I know! But, in all fairness, the teal cover was made for Shiloh before Nolan came along and I could not take it away from her.  It was actually one of my very first sewing projects and used to hide in the corner of my room. You can see how pretty it is below, prior to me washing and accidentally shrinking it. Sewing lesson learned: ALWAYS pre-wash your fabric!
One option I considered for the great crate make-over is simply sewing a matching cover for Nolan’s.  The downside to this plan was that I didn’t have enough fabric for a whole second one and wasn’t sure I could still find it. Also, while I do love the cover, there were changes I would make for the second one which would leave me with creating two brand new covers and not enough fabric for either one. The more I thought about the process to create two brand new covers, the less I liked that plan.
I eventually realized that I liked the idea of having one large cover since the crates are always side-by-side.  I looked around for benches to fit over the top of both making it a functional area while also disguising the crates. Unfortunately, nothing I found fit the crates or my budget.  I had thoughts of building my own but realized I didn’t really have the space or the tools to do this in an apartment.
I thought more and more about simple ways to create a bench or table as a way of hiding the crates and finally decided on a process -- I’d like to have a solid wood top with fabric covering all sides.  It probably sounds totally nuts and hard to visualize but as the plan stands now, I’d like to get a piece of wood cut to the length and width of the crates side-by-side. I’ll then paint it to coordinate with my fabric and staple panels to the underside of the wood piece.  I also want to have separate fabric panels over the doors that can be rolled up when the puppies are in the crates, but let down to completely hide them when not in use -- essentially looking like a large bench or table.  The hard surface can act like a table top and I can set dog treats, pictures, or even a basket with leashes on top. 
Also, with fabric only around the outside, it leaves the two sides of the crates which touch completely open so the puppies will be able to see one another during the day. In my mind, I've decided they’ll love seeing one another but still be seperated and have their own space.  Here is the extremely amateur, cartoon-looking makeover that I envision -- can you tell I am NOT the proud owner of Photoshop? 
I’m still searching for the fabric and trying to determine how many yards it will require, but I’m 99% certain my love of blue / teal will be reflected in my choice. I’d also like to find a coordinating pattern for a lining that you’ll see where the teal and pink are in the picture above. In a sewing project a while back, I made pillows to fit inside the crates. Once I’ve decided on a fabric, I’ll sew some coordinating, soft, dog-friendly pillow covers to complete the whole look.
Sadly, the wall above these crates is also bare.  My 'after' vision involves something functional for sewing and other projects so I’m leaning towards a custom, fabric memo board.  I’d be able to display sentimental photos or keepsakes along with all the images I find to inspire my next project.
I hope to make some progress on all these items during the week and weekend so be on the lookout for some updates and after photos.  For now, I’ve got a promising plan in mind and am in desperate need of the perfect fabric!