


The last we saw of this space, the furniture had been put back into place and a lot of storage had been purchased and put to good use.

After some online / on foot shopping and a few hours of sweat and handy work, my sewing nook is looking like this these days...

Some of the more obvious updates include the new chair...

...ahhh, finally a place to sit! And yes, those are the puppies behind the chair -- it's nearly impossible to photograph anything without getting some part of them in the picture. But back to the chair, it's long, lean legs are not resting on just anything...

... they have a super soft place to land on a new rug! It's definitely less of a necessity, but I'm so so so happy with it and I think it does an amazing job of defining the whole space and tying it all together. I love the pattern, the color, the feel, the size, EVERYTHING about it is perfect!
Maybe I'm most excited about it because the rug hunt has not been an easy one -- I first ordered this one from Overstock.com (which now appears to be sold out).

Online, I loved the color and pattern and it's hard to beat $2.95 shipping. But when it arrived and I got it into place, it was all wrong. The color looked more muted and almost dirty, it wouldn't lay completely flat, and it was not at all soft underfoot. I lost $15 sending it back, but I knew I would not be happy keeping it. And so the rug search continued...
I found the one I ordered at HomeDecorators.com and loved it immediately, but wasn't super happy about the price. I had really wanted a 5x8 rug since it's pretty much the exact size of the nook, but was willing to order the 4x6 to cut down on cost. I continued to do some looking around, but never found anything I liked as much. After going back to stare at the picture once again, I lucked out and stumbled upon a 20% off rug sale! For a craft room, it still wasn't cheap, but it was something. I decided to do some measuring and contemplating about which size to order, so I waited a few days before making the final decision. When I'd made up my mind and went back to the site, chairs were also 20% off AND there was free shipping for a limited time. I looked through the seating options, and found the teal beauty you can now find me sitting at every night. It wasn't what I had originally planned on purchasing, but at 20% off the chair and rug AND free shipping, it made my decision an easy one. With all the savings, I justified the 5x8 rug purchase and patiently waited for my goodies to arrive.
The chair arrived first and has already gotten a ton of use. Then the rug showed up and as much as I wanted to roll it out immediately, there was one more thing I wanted to do which I feared might make a bit of a mess -- install some new lighting!
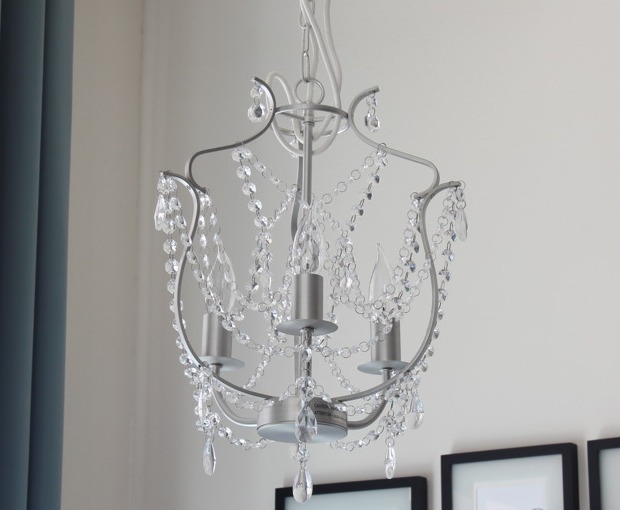
What girly crafting area would be complete without a new chandy hanging above?! This one I found at IKEA and bought immediately because of the great price. Despite my 10 foot ceiling and very limited knowledge of electrical work, I managed to take down the old, boring light and install this one myself. And even more shocking, it turns on and has not caused a fire -- not yet at least :) The one thing I still need to do is shorten the cord. This light had a lot of extra length to it. Removing the extra chain lengths was no easy task, but I didn't fear shoty electrical work doing it. Shortening the actual cord, scares me a little more, so I haven't jumped right into that. For now, I just try to ignore all that extra white cord wrapped around and just enjoy the new look and extra light it provides.
The last and slightly less obvious update in the sewing nook are the doors which have been added to the china hutch.

Other than helping me out by cutting back on dust accumulation, it was a pretty minor change but was a long time coming. I dreaded doing it because I needed to remove the paint I got on the glass during the painting phase, redo the hinges/hardware that would show, and hopefully reinstall them so they hung level.
The paint removal turned out to be pretty easy and just required some scrapping with a box cutter. The hinge makeover took a little more time, but was also pretty easy and worked better than I thought it would. I started out with some very worn, brass hinges which I wanted to be nickel to match my hardware. After a fruitless search for something to replace them with, I decided to just try my hand at painting them. I first put all of them in bowls, then let them soak in soapy water, gave them a good scrubbing and let them dry.

I then followed the directions on the Rub 'n Buff package and started to transform each piece.

They are by no means perfect, but since so little of them shows, I think they turned out just fine. Once they got into place, they blended in perfectly with the new hardware. Hanging to doors level turned out to be quite a challenge -- one that I'm still working on actually. The middle door is so uneven, it doesn't quite shut. If I have some "ah-ha!" moment where I figure this out, I'll be sure to share. For now, I'm living with the imperfection :)
That's the last of the updates in here for now! Still on the list is to add some color to those plain white boxes, the lamp shade and the cork board. It should be easier to make a decision on those things now that the rug and chair are in place. Until then, this is where I'll be whenever I have free time...

Happy Monday to everyone! Hope your weekend was equally as productive :)

What a beautiful sewing room, I bet you feel like a princess! Great job, so light and pretty.
ReplyDeleteHi Kiki - I hope your studio makeover is still going well and that you're loving your new room. :) I also wanted to let you know that I've awarded you a Liebster, the details of which are on my blog. Looking forward to your next update! http://moonthirty.com/feasting-on-liebster/
ReplyDeleteThis is pretty, but I am curious, where do you cut and iron?
ReplyDelete